A Step by Step process : How to Install Joomla Manually (valid version for Joomla 2.5 /1.7/1.6 too)
To complete the manual Joomla installation, follow the steps listed below:
On Server
Step 1: Upload it in the public_html folder of your account. You can do that through an FTP client like FileZilla or via cPanel -> File Manager -> Upload file(s). This way, after the installation is completed, the script will appear once your write something like http://yourdomainname.com in your web browser. Or you can create a subfolder there and upload the file in it. The Joomla installation will be available at: http://yourdomainname.com/subfolder.
Step 2: Once you are in the File Manager, please navigate to the uploaded file and extract it by clicking on the Extract link. It will create a subfolder: Joomla-x.x.x., where instead of x.x.x. is the current version. So you can move the files one level up in the desired directory. The other option is to extract the file in your computer and then to upload the content in the desired folder via FTP.
On Localhost
Step 1: If you installed XAMPP server for PHP, then go to "htdocs" root folder on your installation directory
If you installed WAMP server for PHP, then go to "www" root folder on your installation directory
Step 2: Extract the downloaded c ZIP file. It will create a subfolder: Joomla-x.x.x., where instead of x.x.x. is the current version. So you can move the files on the appropriate root folder. Or you can create a subfolder on the appropriate root folder and then move on it.
Step 3: Create a MySQL database from cPanel -> MySQL Databases or http://{hostname}/phpmyadmin. There you should create a database.
Step 4: Now type the URL of the newly-uploaded Joomla script on your browser. If the files is uploaded in the main web directory,
On Server
use http://yourdomainname.com. In case you have uploaded it in a subdirectory, open http://yourdomainname.com/example.
Replace the domain and the directory names with the corresponding ones for your web site.
On Localhost
http://{hostname}/subfolder. Replace hostname with your local server name ex: localhost,if you are using PORT no according with hostname then you can use http://{hostname:PORT}/subfolder. ex: localhost:80 instead of {hostname:PORT}.
Step 6: On the next page Joomla will check whether the system requirements are met on the server. If one or more are not met with joomla server requirements, a corresponding message will be shown. Once you make sure that all system requirements are met, proceed by clicking on the Next button from the top right menu
Step 7: On the next page you should read and accept Joomla's license.
Step 8: Once you clicked next from above scree, here you have to enter the MySQL credentials for the new Joomla installation. Please refer ones set it up in Step 3. Pelase refere below example entries and explanations for these fields;
Step 9: On the next screen, if you are clear with your File Transfer Protocol (FTP) configuration, please enter or keep the default settings and click Next to proceed.
Step 10: On the current page the main Joomla configuration should be defined like Specify your site name, meta description and keywords, admin user, email and password.Click on Next to proceed.
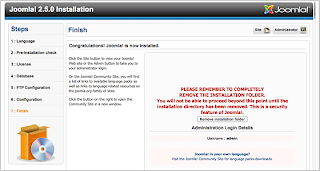
Step 11: In the last page of the joomla installation section the confirmation of Joomla installation process will be present and now you can proceed with your Joomla Site.
Related Posts


No comments:
Post a Comment